 In 2007, Microsoft unveiled a brand new disk caching feature, known as ReadyBoost which was initially intended to make Windows Vista’s operating system that much quicker.
Since then ReadyBoost has been available on every version of the Windows operating system up to the current Windows 11 OS.
If you’re using Windows 11 on a standard hardware setup, you’ll enjoy some decent performance enhancements. That said, if you’re using the programme on more higher-end gear, then Windows ReadyBoost isn’t for you.
In this blog, we’ll be taking a closer look at ReadyBoost and what it can offer you.
How Does Windows ReadyBoost Work?
In order to understand how ReadyBoost can help you, we first must understand what it is and how it works.
ReadyBoost works in conjunction with a tool called SysMain, formerly known as SuperFetch, a larger component built into the operating systems.
SysMain is a kind of disk cache management software, which is in place to enhance the operating system’s performance as you load and move between programmes and applications that you use most frequently.
In this sense SysMain is an adaptive technology, since the software is able to monitor the data and system files related to your application usage and preload them into a cache which loads them into RAM more quickly.
SysMain is also responsible for managing the priority applications on the machine through I/O prioritisation technology – this means each application is given a high or low priority based on user usage.
Essentially, it means that the system can temporarily sideline certain applications, to ensure that the performance is boosted for higher priority programmes and applications.
Should I Use ReadyBoost?
Although the SysMain system works perfectly adequately using the system hard disk to perform the caching processes, the drawback of the hard disk utilising moving parts does mean that this can limit the speed that the data is exchanged between the RAM and cache.
This is where a USB stick and ReadyBoost really comes into its own.
When you connect a flash-based memory device to your system and turn it into a ReadyBoost device, SysMain will copy the cache from the device’s hard disk and utilise ReadyBoost to maintain cache management.
Since flash drives don’t utilise moving parts, it means that the data exchange between RAM and the cache is faster and much more efficient.
Once ReadyBoost is enabled it monitors hard disk usage and is only required to spring into action to aid file reading and delivery from its own copy of the cache when it is doing so to boost performance.
How to Activate Windows ReadyBoost
ReadyBoost is designed to be used in conjunction with external flash devices, so in addition to USB drives, this could mean SD cards and other types of memory cards.
ReadyBoost Performance Requirements
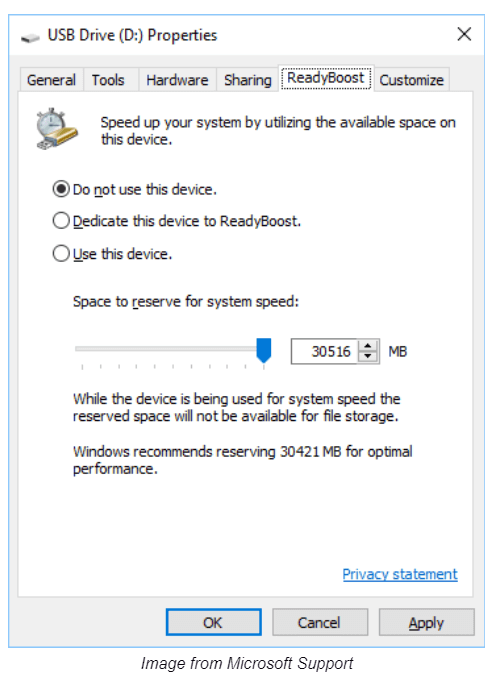
Firstly, you need to access the Properties of the device in Windows 11, and then select the ReadyBoost tab. Once you do this, the operating system will begin running diagnostics to determine whether ReadyBoost and your device are capable of running in harmony.
To ensure that your device is compatible, it must meet the following specs:
At least 256 MB in size, with a minimum of 64 KB of available space.
Access time of at least 1ms.
At least 2.5 MB per second for 4 KB random reads.
At 1.75 MB per second for 1 MB random writes.
If the device isn’t suitable, you’ll be given an error message explaining that the performance of the device isn’t suitable to pair up with ReadyBoost.
ReadyBoost & SSD Hard Disks
If your system has a built-in SSD hard disk, which is now far more common than when ReadyBoost was first rolled out back in 2007, then you’ll find that SysMain in conjunction with your SSD hard disk will outperform ReadyBoost.
This is probably one of the only times that ReadyBoost won’t be effective when using standard machinery.
Configuring ReadyBoost On Your Device
If your device is compatible, which most USB’s will be, you now need to configure your device for ReadyBoost use.
The best thing to do when you reach this prompt, is to Dedicate this Device to ReadyBoost.
However, before doing so it’s a good idea to reformat the device, which we covered extensively in a recent article. The best approach at this stage is to reformat using the exFAT system, since this was originally designed for flash-based memory, with the default allocation unit size.
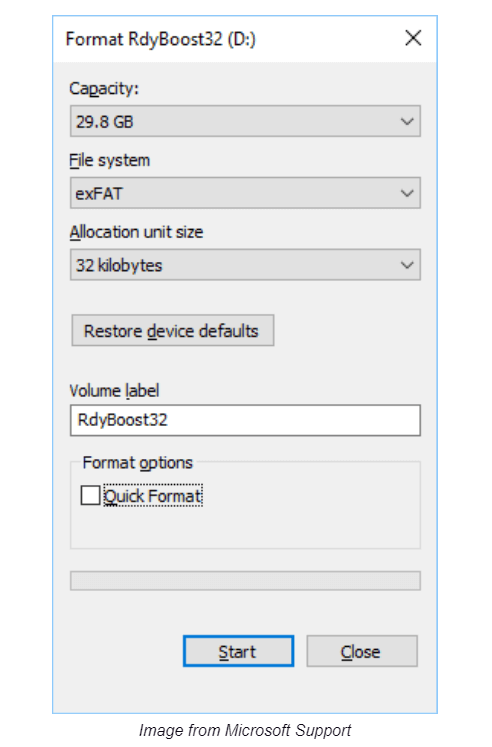
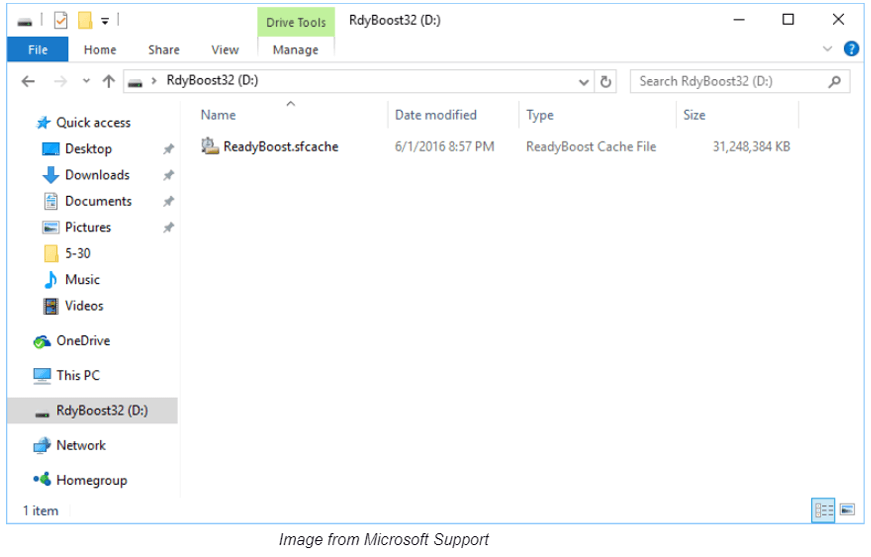
Once you’ve done this click start and ReadyBoost will begin configuring your device to use as a caching system by creating a root file in the USB drive.
Monitoring ReadyBoost Performance
If you’d like to get an analytical viewpoint of ReadyBoost in action, then you’ll need to add ReadyBoost to the Windows Performance Monitor.
To do this, first open the start menu and search for “Performance Monitor”. Once this opens, click Monitoring Tools and toggle to Performance Monitor.
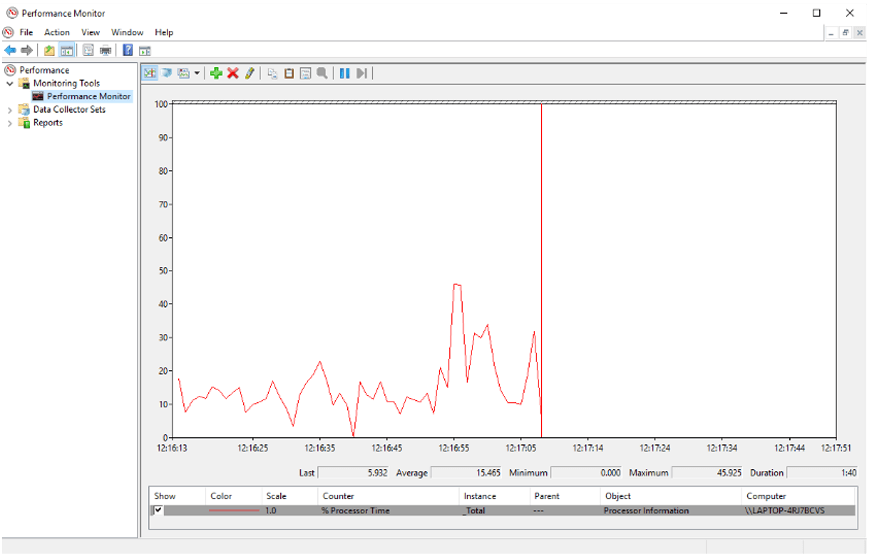
In order to add ReadyBoost to your performance monitor, click on the green plus button.
Then on the add counters section, toggle down and select the ReadyBoost cache from the available counters. Click add to make a new entry into the list and hit OK to save the additions.
Disabling ReadyBoost
Although as discussed, there are plenty of benefits to utilising ReadyBoost, there may be many reasons you might want to disable it. Perhaps you’ve bought a new computer, you no longer need ReadyBoost and you’d like to use your USB device again.
Firstly, connect the USB drive to your computer, navigate to My Computer or This PC, and then right-click on the drive’s icon, and select Properties. Then navigate across to ReadyBoost, and mark Do not use this device.
Then be sure to access your USB drive and delete the ReadyBoost file.
If you’d like more USB performance, or you’d like to learn more about our extensive product ranges, why not get in touch with us today?


